I have always wanted to make baby shoes, while I was looking through the book "Quick & Clever Felting" by Ellen Kharade it has a tutorial on a baby boot. I suddenly got really excited and flip to the back of the book to search for the template. I didn't make it according to the original size, I just used the template just as it is incase I didn't mess up and waste a lot of materials. I would never thought that it turned out to be a cute little finger bootie, the shape has shrunk so much after wet felting and it fits perfectly for your fingers to wear! Another cute craft that I have discovered!
 |
| la la la~ so cute and pink, walking on my finger bootie~ |
 |
| I would want a real one of these. |
So here are my working processes/ tutorial, if you are interested please get the book and it will have the template for a real size baby bootie :D! Full credit goes to Ellen Kharade for the template. Please excuses the photos, I dislike taking photos at night but I am only free at this time. I like to take my photos during the day because it gives true colours and it's more clear and sharp ( in other words, I am not a good night photographer. )
 |
This is the page I saw and I told myself that I have to make it!
I used baking paper as a template but I highly suggest you use plastic sheet rather than paper.
You will be using 4g of wool. |
 |
I used 2g for each boot, therefore 1g for each side.
Add the fiber layers horizontally and vertically to make sure it's even and spray with soap water. |
 |
| Flip to the back and repeat the last step. Fold in the excess fibre around the template. |
 |
| Both layers are done, spray more soap water. |
 |
| Rub it between your palms, the shape will shrink. When you can't pull off any fibre on the surface it is ready for the next step. The fibre now becomes felt. |
 |
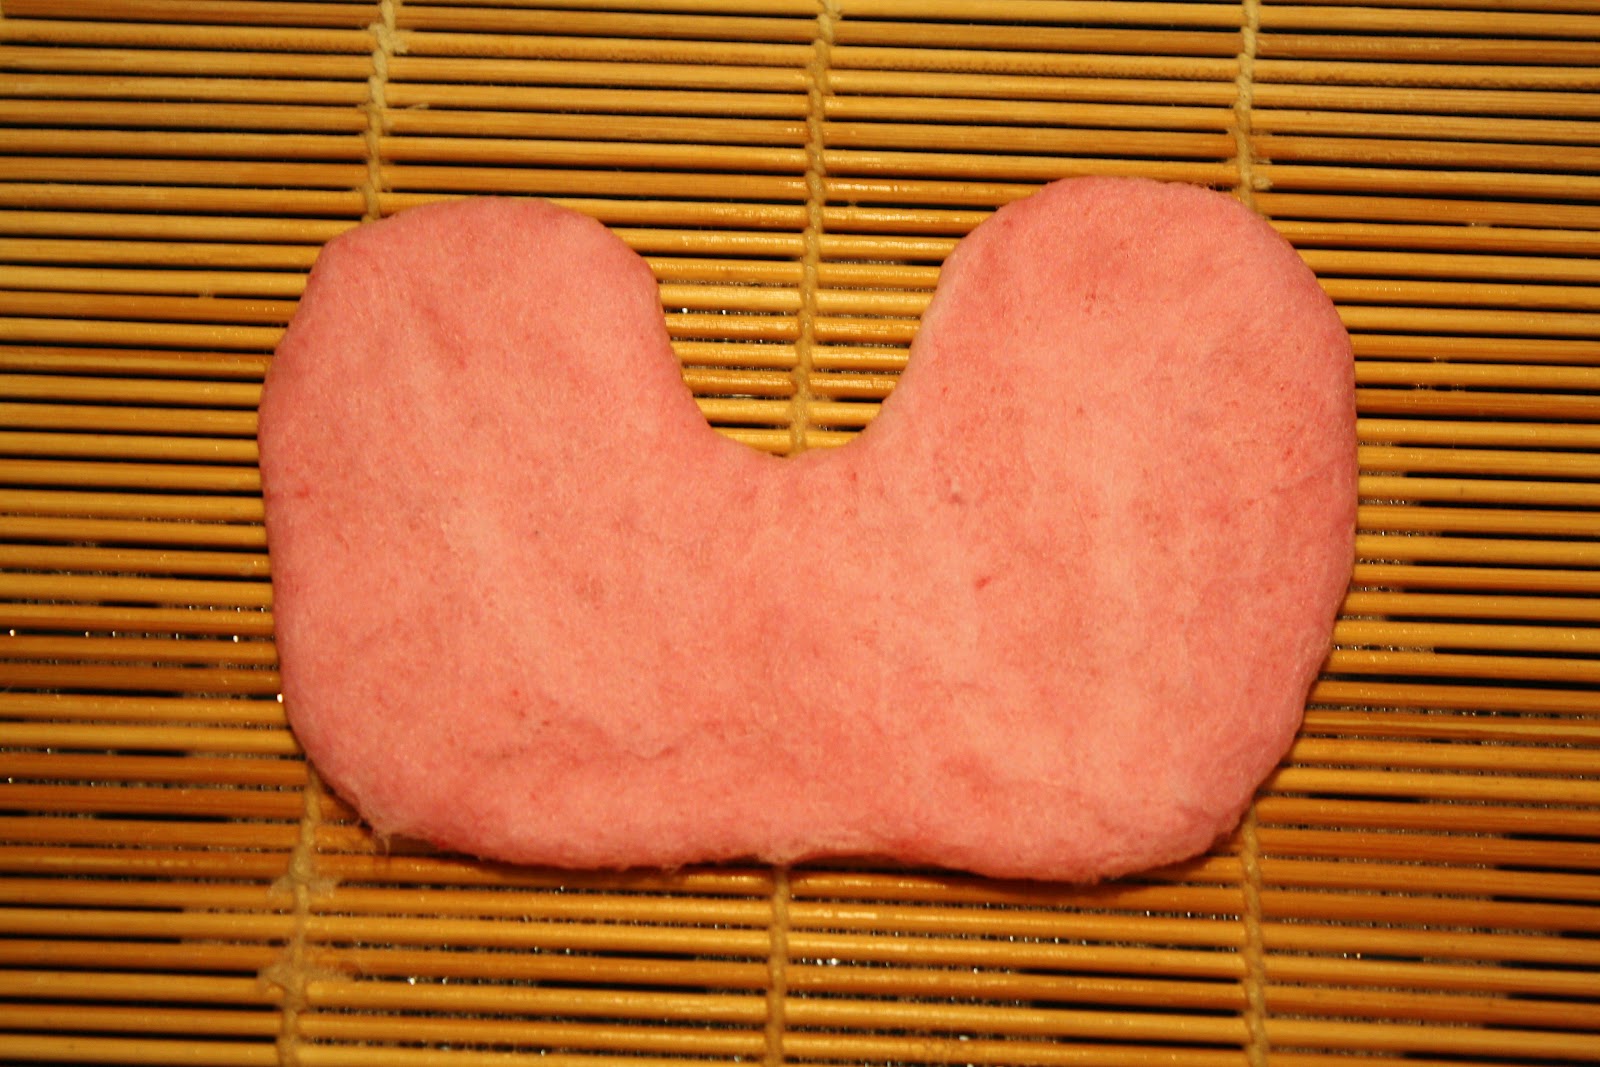
| Cut it in half! Looks so cute just by this. |
 |
| Gently pull out the template and sculpt the shape. |
 |
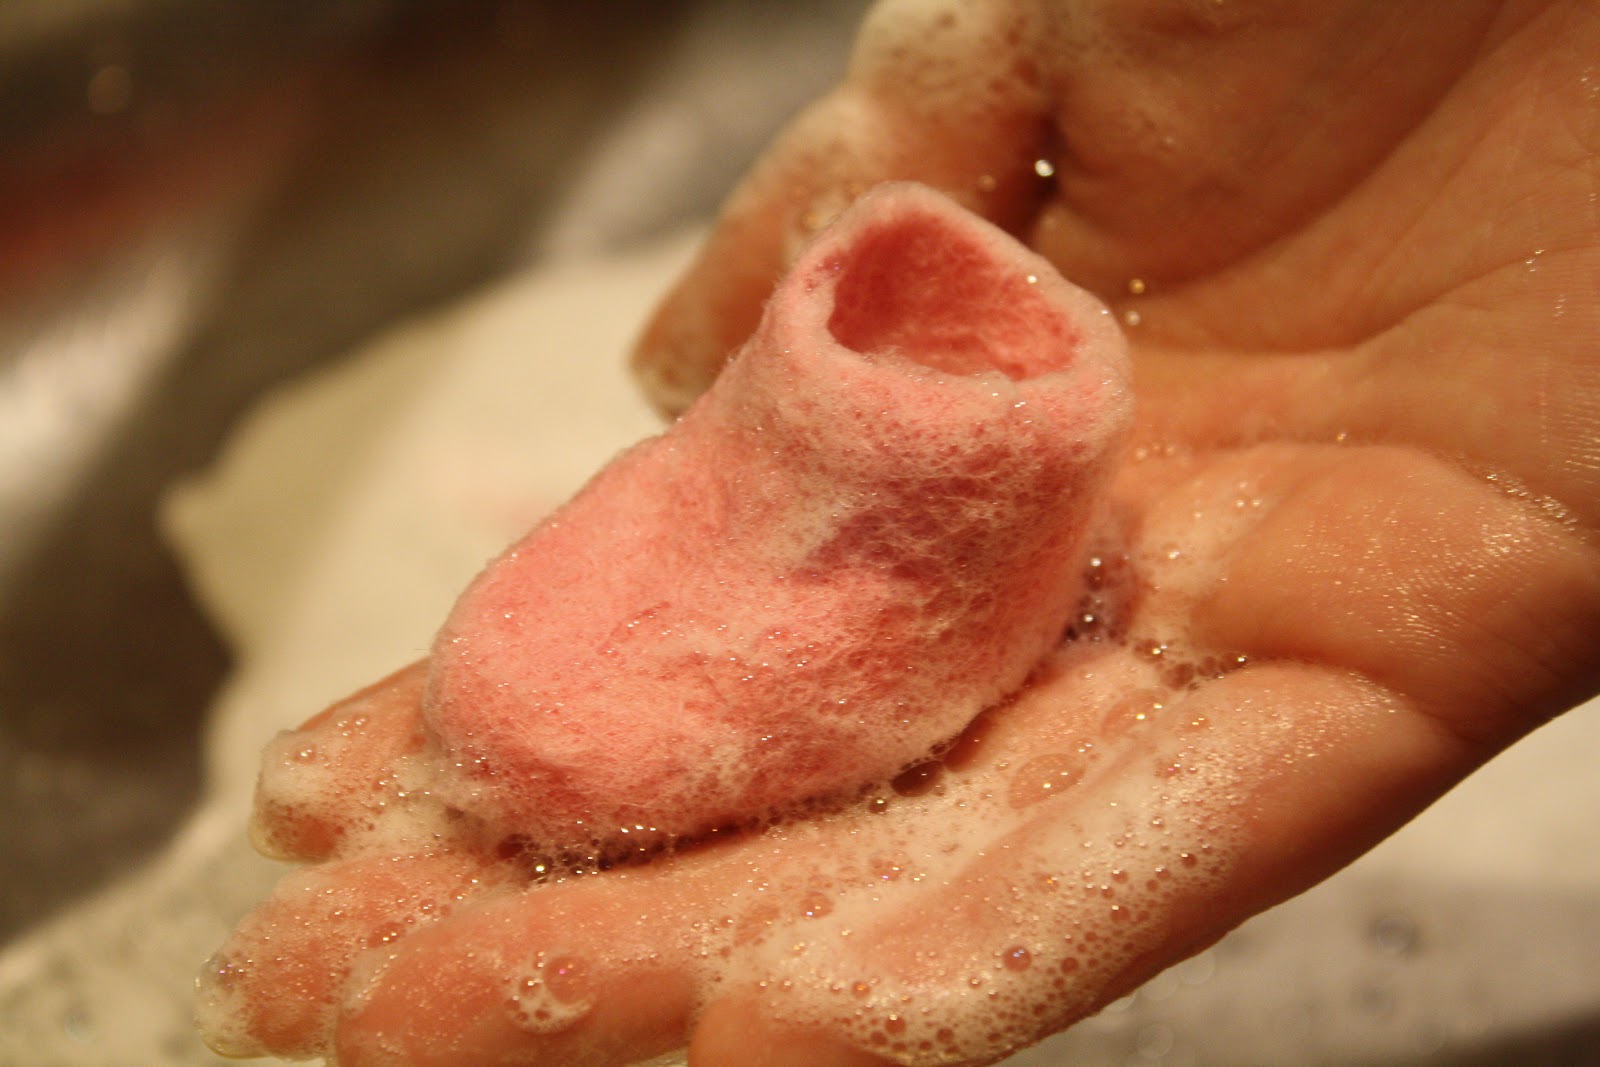
Back to the sink, keep rubbing with your finger on the surface to sculpt the shape.
Also run it with warm-hot water so the fibre will shrink and tighten.
Always have soap when you are rubbing, add more if its gone. |
 |
| When you think you have the shape wash it with warm-hot water and rinse off the soap. |
 |
This is what happened to my fingers after soaking in bubbles for 2 hours.
And then the next day my hands felt really dry. T_T |
 |
I needle felted some parts to make the surface more smooth.
You can skip this if you think it's fine after the wet felting process. |
 |
| tada! here it is, super cute finger bootie!! |
I made a red one on the other day, it's super fun, but also very time consuming. Might turn the red one into Christmas boots and i'm going make more booties when my holiday comes!
Happy Crafting!
Lisa


Aww, they're so cute ^w^
ReplyDeletethank you so much! your blog is very cute also :D
DeleteThis is so cute! Btw, can i use this same method to make felted ribbons just like the ones you did? ^^ ♡
ReplyDelete